- Home
- Pelvis
- Anterior Pelvic Tilt
- ASIS-PSIS Photo Angle
ASIS-PSIS Photo Angle
Two points on the pelvis, one side photograph, one angle from horizontal. It is the most direct reading of pelvic tilt available without equipment.
- Gear
- A phone on a tripod, a plain wall, and a way to mark two points on the skin.
- Stance
- Stand side-on in your usual stance with the top off or tucked, so the pelvis can be seen. Do not tuck the pelvis for the photograph.
- Duration
- 120 s
- Camera angle
- one frontal and one lateral frame
- Position
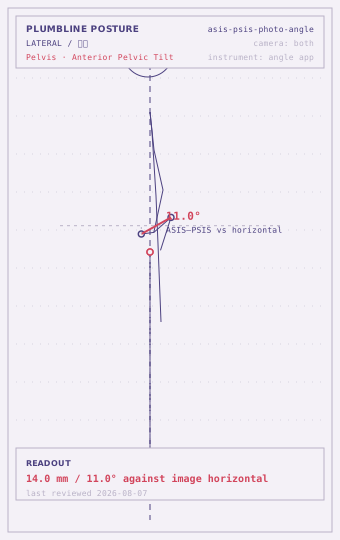
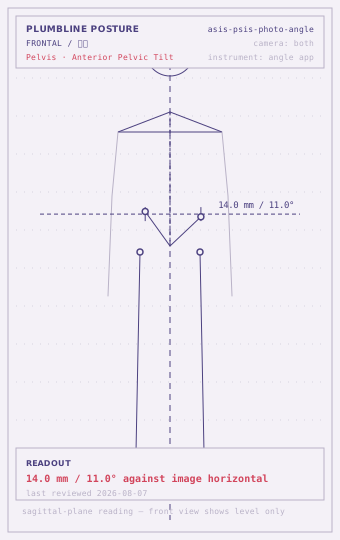
- Mark the ASIS and the PSIS on the same side, take the side photograph, and measure the angle of the line between them from horizontal.
Bone landmarks
-
ASIS — coordinate id
asis -
PSIS — coordinate id
psis -
Greater trochanter — coordinate id
greater-trochanter
Within range
0-5 °Criterion: The ASIS-to-PSIS line sits within 5 degrees of horizontal in the resting frame.
The pelvis is close to level. Record the date and re-photograph in three months.
Borderline
6-12 °Criterion: A tilt of 6 to 12 degrees, or a resting tilt that drops by at least 4 degrees when the pelvis is gently tucked.
A real tilt that the pelvis can still leave. This is the band where the daily sitting position moves the number most.
Deviated
over 12 °Criterion: More than 12 degrees at rest and barely changing on cue, or the ASIS and PSIS cannot both be identified because of body composition or a fixed posture.
When the angle does not change on cue, the reading has stopped describing a carriage habit. Screen the hip's extension range and the lumbar spine's movement before reading it as posture.
| Tier | What to do |
|---|---|
| Low | Reading sits in the within-range band and is symmetric side to side: re-measure every 8–12 weeks and record which way the number is moving. |
| Moderate | Reading sits in the borderline band, or the two sides differ clearly: re-measure every 4–6 weeks and log the daily trigger (hours seated, one-sided load). Change the situation before adding anything to the routine. |
| High | Reading sits in the deviated band, or several screens at the same station all read deviated: get a clinician to rule out a structural or neural cause before continuing to self-screen. |
| Referral threshold | Leg pain that travels past the knee, numbness in the saddle area, or loss of bladder or bowel control needs urgent medical assessment, not a photograph. |
Commonly co-occurring
How to read this
The direct measurement
Almost all pelvic tilt screening is indirect. You measure the lumbar curve, or the gap under the back against a wall, and infer the tilt from it. This screen marks the two bony points and measures the tilt itself.
The cost is that both points have to be findable and both have to be marked consistently. The benefit is that the reading no longer depends on how thick the tissue under the back is, which is the largest single source of error in every wall-based pelvic screen.
Running it
Stand side-on to the camera at 2.5 to 3 metres, with the pelvis visible. Find the ASIS at the front and the PSIS at the back on the same side and mark both with a small dot. Take the frame with the camera level and square.
Draw the line between the dots and measure its angle from the horizontal. A line that runs uphill from front to back is an anterior tilt; the number is how many degrees uphill.
Then take a second frame with the pelvis gently tucked, and measure the same angle. The difference between the two frames is how much of the tilt the person can remove voluntarily.
Reading the pair
A resting angle of 11 degrees that drops to 4 when tucked is a position the pelvis visits. An 11 degrees that stays at 10 is a position the pelvis lives in, and it is worth checking the hip and the lumbar spine before treating it as a carriage habit, because a hip that will not extend will hold the pelvis forward no matter what the person does.
Limits
Body composition, a loose shirt and an imprecise landmark all introduce error of a few degrees, and the published norms for pelvic tilt are wide. The number is useful as a series and misleading as a single reading. Write the date beside it.
Questions
How do I find the two points?
The ASIS is the front point of the pelvis, found by running the fingers along the belt line until they meet a firm knob below and lateral to the navel. The PSIS is the corresponding bump at the back, found by following the crest of the pelvis around until it dips. Both are easier to find standing than lying down.
The two points are not level on me even when I try. Is the measurement wrong?
No. The pelvis sits in three dimensions, and a side photograph flattens two of them. A difference in the left-to-right plane, or in how far forward each point sits, shows up as a change in the measured angle. Keep the camera square to the body and the same distance every time, and treat the number as comparable only with your own series.
Should I take the photo before or after sitting?
Before, standing, having been up for at least a few minutes. The pelvis carries the shape of the last long sitting position for a while, and photographing immediately after getting up records the chair rather than the body's habit.
Disclaimer
This page is informational only. It is not a medical diagnosis and it is not treatment or rehabilitation advice. Run every self-screen inside a pain-free range; stop and see a clinician for pain, numbness, weakness, night pain, or anything that started after an injury. The readout criteria are drawn from healthy-adult norms — prior injury, surgery and individual variation all shift the numbers.
lastReviewed 2026-08-07 · record asis-psis-photo-angle · published 2026-08-18