- Home
- Pelvis
- Anterior Pelvic Tilt
- Standing Pelvis Tuck Photo Pair
Standing Pelvis Tuck Photo Pair
Two photographs from the same spot: one resting, one with the pelvis tucked. The difference between them is the reading, and it is more useful than either frame alone.
- Gear
- A phone on a tripod, a plain wall, and a mirror or a partner to confirm the tuck.
- Stance
- Stand side-on in your usual stance, pelvis visible, arms relaxed. Two frames: one resting, one with the pelvis tucked.
- Duration
- 120 s
- Camera angle
- one frontal and one lateral frame
- Position
- Photograph the resting stance, then tuck the pelvis gently and photograph again from the same spot without moving the feet. Compare the two frames side by side.
Bone landmarks
-
ASIS — coordinate id
asis -
PSIS — coordinate id
psis -
L3 spinous process — coordinate id
lumbar -
C7 spinous process — coordinate id
c7
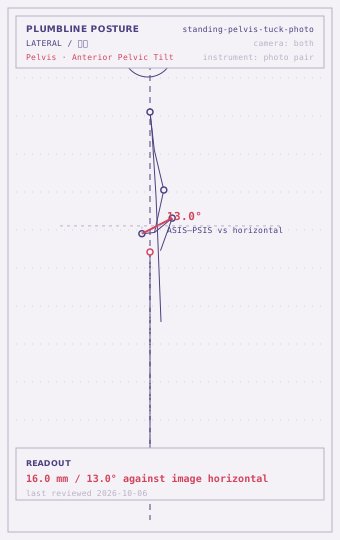
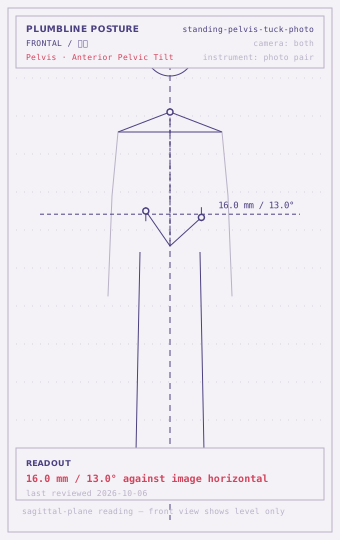
Within range
0-6 °Criterion: The resting frame shows 6 degrees of tilt or less, and the two frames look broadly alike.
The standing position is already close to the corrected one. The tuck adds little, which is the best available result.
Borderline
7-15 °Criterion: The resting frame shows 7 to 15 degrees and the tucked frame shows at least 5 degrees less, with the feet unmoved.
The pelvis has room to move and simply is not visiting that position by default. Record how the correction affects the ribs and the knees in the second frame.
Deviated
over 15 °Criterion: More than 15 degrees at rest, or the tucked frame changes little, or the tuck is only possible by bending the knees or pulling the ribs down hard.
A tilt that requires the knees to bend or the ribs to pull down is being held from above and below at once. Read the hip and the thoracic spine before calling it a pelvic finding.
| Tier | What to do |
|---|---|
| Low | Reading sits in the within-range band and is symmetric side to side: re-measure every 8–12 weeks and record which way the number is moving. |
| Moderate | Reading sits in the borderline band, or the two sides differ clearly: re-measure every 4–6 weeks and log the daily trigger (hours seated, one-sided load). Change the situation before adding anything to the routine. |
| High | Reading sits in the deviated band, or several screens at the same station all read deviated: get a clinician to rule out a structural or neural cause before continuing to self-screen. |
| Referral threshold | A tilt that cannot be corrected without pain, or that comes with groin pain or a catching hip, needs an assessment. |
Commonly co-occurring
How to read this
A pair, not a picture
Any single posture photograph is ambiguous. A pelvis that looks tilted may be tilted, or may be held forward by a hip that will not extend, or may simply be the shape of that person’s pelvis in that stance. The way to tell the difference is to photograph the correction as well as the position.
The second frame answers the question the first one raises: can this body leave the position it is in, without changing anything else.
Taking the pair
Stand side-on in your normal stance, pelvis visible, feet in a marked spot. Take the first frame. Then tuck the pelvis — front of the pelvis rolled up toward the ribs, tailbone not pulled under — and take the second frame without moving the feet or the camera.
Compare the two. In the corrected frame, note three things: how much the lumbar curve changed, whether the ribs came down or flared further, and whether the knees bent. A tuck that only works with the knees bent is a leg movement, not a pelvic one.
Reading the difference
A clear difference between the frames means the position is voluntary and not held. That is good news: it means the tilt responds to changes in how the day is spent, because the body is not defending the pelvis’s position against anything.
A small difference means the tilt is being held by something the tuck cannot reach, and the candidates are the hip behind it and the rib cage above it. Check the hip’s extension range and the thoracic position in the same frame before deciding which.
Keeping the series
The value of this screen is entirely in repetition. Take the pair on the same marked spot, at the same distance, at the same time of day, and write all three facts down. A pair from six months ago compared against a pair from today is a real reading; a pair taken from an unknown distance against a pair taken from another one is not.
Questions
How do I tuck without bending my knees?
Think of rolling the front of the pelvis up toward the ribs, not of pulling the tailbone under. If the knees bend, the tuck is coming from the legs and the frame will show a lowered body rather than a changed pelvis.
Why not just measure one frame?
Because a single frame cannot separate a pelvis that is tilted from a pelvis that is being held tilted by something else. The second frame is the control. If it looks the same as the first, the tilt is not a habit the person can leave at will.
Should the feet stay in exactly the same place?
Yes, and mark the floor if you have to. Moving the feet changes the camera-to-body distance and the body's position over them, and both change the apparent tilt more than the tuck does.
Disclaimer
This page is informational only. It is not a medical diagnosis and it is not treatment or rehabilitation advice. Run every self-screen inside a pain-free range; stop and see a clinician for pain, numbness, weakness, night pain, or anything that started after an injury. The readout criteria are drawn from healthy-adult norms — prior injury, surgery and individual variation all shift the numbers.
lastReviewed 2026-10-06 · record standing-pelvis-tuck-photo · published 2026-10-15